spring up!

March 8th, 2018 | Posted by admin in Outdoor Containers - (0 Comments)

It’s too early to plant spring here but we can “Spring Up” our winter planters by taking out the holiday items and adding dried flowers and branches. Here we added dried hydrangeas, Yarrow, and Apple blossom branches.  Just the perfect touch to get us ready for spring!


BEFORE:


AFTER:


Print Friendly, PDF & Email

more winter containers

December 6th, 2017 | Posted by admin in FLOWERS | Outdoor - (0 Comments)

IMG954473

Winter containers are actually some of my favorite to work on.  It is more about arranging greens and specialty items than planting.

IMG954525

We like to have our clients remove the fall or summer plants and keep the container about 3/4 full of soil.  This helps us because this time of year the containers may freeze and then it’s very difficult to get the greens placed.

IMG954549

I use a variety of winter branches from silver, noble, and fraser fir to incense and blue coned Cedar. I adore red huckleberry and German boxwood to help build the containers structure, then we have fun arranging around that.

IMG954551

The fun begins when we add floral options that can work and last in the containers.  My favorites are berzelia, brunia, and leucadendron cones.  Like icing on a beautiful cake we add the toppers and accents… birch branches, curly willow, mossed branches, magnolia tips, pine cones, pomegranates, and other surprises such as artichokes and sleighs this year!   The idea is to have fun and make it fit your home’s style and your holiday whatever it may be!

IMG954571

A beautiful winter container can last through the early spring and help enhance the entrance of your home.


Print Friendly, PDF & Email

winter containers

November 9th, 2017 | Posted by admin in Outdoor - (0 Comments)

Some ideas for your containers this winter season.  I love to work with a variety of greens, interesting pods, birch, willow, and of course winter pine cones & berries.  Have fun, always remember to keep it full!!  Abundance is the key.

IMG950762 IMG950890 IMG950908 IMG950831

IMG950910


Print Friendly, PDF & Email

recipe: s’mores pie

July 12th, 2017 | Posted by admin in Desserts | RECIPES - (0 Comments)

170712_125615_84

I love s’mores but especially on the Fourth of July or any summer party around a fire pit!  So, when I saw this recipe in an old cookbook, “The Back in the Day Bakery Cookbook, I had to try it!  This pie was a big hit with everyone who tried it… second helpings were required!!  I used a deep pie dish so I tweaked the recipe a bit, but the credit goes to Cheryl & Griffith Day and their amazing recipes!


CHOCOLATE CUSTARD FILLING INGREDIENTS:
• 2 cups whole milk
• 5 large egg yolks
• 6 tablespoons sugar
• 3 tablespoons cornstarch
• 1/4 tsp fine sea salt
• 1 tsp pure vanilla
• 7 ounces of good bittersweet chocolate, melted
• 2½ tablespoons unsalted butter, cut into cubes at room temp


GRAHAM CRACKER CRUST INGREDIENTS:
• 3 cups graham cracker crumbs
• 6/8 cup packed brown sugar
• 12 tablespoons unsalted butter melted


MARSHMALLOW TOPPING INGREDIENTS:
• 6 large egg whites
• ½ tsp cream of tartar
• 1½ cups sugar
• 1 tsp pure vanilla


You will need a kitchen blow torch!


GRAHAM CRACKER CRUST DIRECTIONS:

• Position rack on lower level and preheat oven to 350 degrees F.

• In a medium bowl mix all the ingredients until all is moistened.

• Press mixture into the pie plate going up all the sides and bottom of the pan.

• Bake for about 6-8 minutes until golden and let cool before filling.


170712_125614_81

CHOCOLATE FILLING DIRECTIONS:

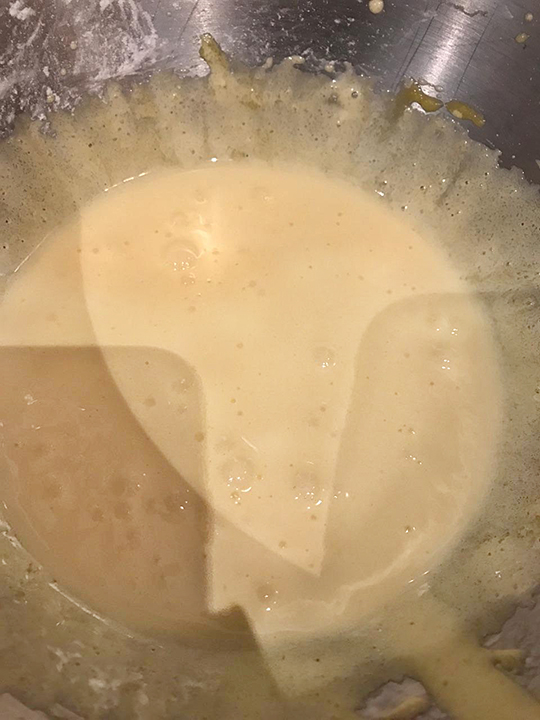
• Whisk the egg yolks, sugar, corn starch, and salt together in a heat proof bowl until thick and pale in color, set aside.

• In a medium saucepan bring milk to a gentle boil.

• Whisk about half of the hot milk into the egg mixture, then continue to whisk in the rest in a steady stream.

• Set the bowl over a medium saucepan of simmering water (do not let the bowl touch the water) and cool the yolk mixture whisking constantly until thick and glossy, about 7-8 minutes.

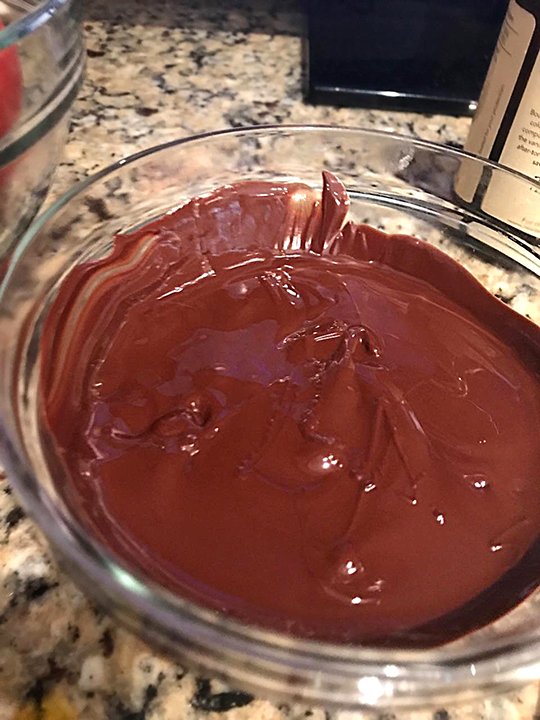
• Remove the bowl from the heat and whisk in the vanilla and chocolate.

• Let this set for 2 minutes to cool, then whisk in the butter until the custard is smooth and silky.

• When cool, put it into graham cracker crust and cover and put in the fridge.


MARSHMALLOW TOPPING DIRECTIONS (pay attention and keep whisking!!):

• Put the egg white, cream of tartar, and sugar in a large heatproof bowl.

170712_125614_80

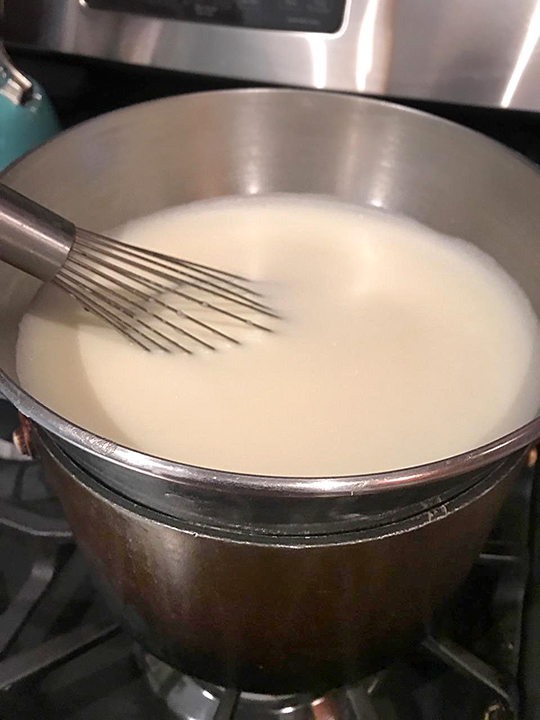
• Set over a sauce pan of simmering water (do not let the bowl touch the water) and whisk constantly until sugar is completely dissolved and the egg whites are warm to the touch, 3-5 min.  The mixture will appear pale and opaque.

• To make sure sugar is dissolved rub the mixture between your fingers.  If grainy then whisk some more!

170712_125614_82

• Transfer the mixture to the bowl of a stand mixer fitted with the whisk attachment.

• Add the vanilla and starting on low speed whip the egg whites gradually increasing the speed to high until the marshmallow topping is glossy and forms peaks, 6-8 minutes.

IMG_0375

• You can fill a pastry bag and pipe the mixture on top of the chocolate pie or just loosely pile it on top making big luscious swirls!

• Toast the topping lightly with a kitchen blow torch!


This pie is best served the same day, but can keep covered for up to 3 days.  I prepared the crust and chocolate filling the night before and the day I served it topped off the pie with the marshmallow topping.

Enjoy!!


Print Friendly, PDF & Email

hot colors in the summer

June 28th, 2016 | Posted by admin in FLOWERS | Outdoor - (0 Comments)

IMG951108

I love hot colors in the summer and this year I planted a few.  The purple passion flower is stunning, a brilliant climber that surprises you with its blooms.  The Echinacea or Hybrid cone flower is such a beautiful melon color I had to add it to the garden.  Foxgloves are one of my favorite flowers, so were my gorgeous large hot pink Digitalis, but they don’t last in the summer heat.  So I added a new variety that blooms all season and has a hint of yellow with the hotter pink.  In the back there is also purple salvia and I planted a few annual star flowers to the mix.  Every year I continue to find a few more plants that make me smile.

IMG_1020

How wonderful to enjoy a summer window box of simple and sweet flowers that just keep getting better as the season progresses.  In this box I used white geraniums, Wedgewood Angelonia, a variegated potato vine, mini petunias, star flowers, and Alyssum.

IMG_0970

Shade containers never get boring.  Here is the front of a house I did using a large supported Fuchsia bush as the center and surrounding it with coleus, begonias, ivy, and more fuchsia.  It has a great deal of color for a shade container and will last well into the fall.

FullSizeRender

This is a shade container set back in a secret garden and I decided to use these amazing begonia leaves, with caladeums to sneak in a bit of color.  A very simple container making a big statement.  I really love shade plants!


Print Friendly, PDF & Email

recipe: celebration cake

June 10th, 2016 | Posted by admin in Desserts | RECIPES - (0 Comments)

IMG950399

This may be my new favorite cake!  It’s an old classic recipe from the 1950’s when cake was the dessert of choice.  It’s called a champagne cake and the recipe was revamped in “Baked from Scratch”.  I also revamped their recipe and I think it should be called “Celebration Cake”!  Whatever the name… it’s delicious!

I have two different frostings. The first is a butter cream and the second is the corrected fluffy strawberry frosting that was referenced in the original recipe incorrectly. I doubled the recipe below to make 4 cakes, so you have a four layer cake.  I made the first batch and then the second.

The cake was tall, impressive, and so delicious!  I am always a fan of a great butter cream frosting but again you can also use the fluffy whipping cream frosting and what’s ever bad with whipping cream!


CAKE INGREDIENTS: (Makes 2, repeat for a 4 layer)
• 1 cup butter softened
• 2 cups of sugar
• 2 teaspoons of vanilla
• 2-1/4 cups of all-purpose flour, “King Arthur’s Flour”
• 2-1/2 teaspoons of baking powder
• 1/4 teaspoon of salt
• 1 cup of pink champagne or sparkling wine, room temperature
• 5 large egg whites, room temperature

IMG_0376

STRAWBERRY BUTTERCREAM FROSTING INGREDIENTS:
• 2 cups of unsalted butter softened
• 1 2lb bag of confectioners sugar
• 1/2 cup heavy whipping cream
• 1/4 teaspoon of kosher salt
• 1/3 cup of finely chopped strawberries

IMG_0378

WHIPPED CREAM FROSTING INGREDIENTS:
• 1-1/2 cups of chopped strawberries
• 2 cups of heavy whipping cream
• 1 cup of confectioners sugar
• 1/4 cup champagne


ADDITIONAL INGREDIENTS:
• Garnish fresh strawberries


DIRECTIONS:
• Preheat oven to 350 degrees. Butter two or four 9″ round cake pans, then dust with flour. Line bottoms with parchment paper and repeat the butter and flour dusting.

IMG_0374

• Mix butter and sugar at medium speed until fluffy always stop to scrape down sides of bowl then beat in vanilla.IMG_0375

• In a separate bowl whisk flour, baking powder, and salt.  Gradually add flour mixture to butter mixture alternating with the champagne and ending with the flour beating until combined.IMG950385

• In another bowl beat the egg whites at high speed until stiff peaks form then gently fold into the batter on third at a time. Divide batter between pans smooth the tops.IMG_0377

• Bake until wooden tooth pick comes out dry, about 22 minutes.  Let cool in pans for 10 minutes then remove from pans and cool on wire racks.

IMG_0379IMG950387

• Butter cream frosting: Beat butter at medium speed until creamy 5-6 min then add in sugar gradually with cream and salt beating until smooth. Then add in berries and frost your cake!

IMG950383

• The Whipped cream frosting requires you to puree the strawberries set aside and whip the whipped cream with sugar until soft peaks form. Add in the champagne gradually and the berries.  Note: I have not made this frosting so I am sharing the “Baked from Scratch” information.

IMG950388

• When the cake is cool remove the parchment and frost each layer, then put a light crumb frosting the outside of the cake, and finally spread the frosting on top and sides.  Refrigerate 1 hour before serving and garnish with berries.

IMG950389

This is a beautiful cake that tastes wonderful and is a show stopper on a beautiful cake plate!!

Enjoy!!!


Print Friendly, PDF & Email

trip to Istanbul

April 8th, 2016 | Posted by admin in UPDATES - (0 Comments)

I received an amazing gift from my youngest son Josh.  He took me on a trip to Istanbul Turkey last month. The gift of time was something I will cherish as I know how rare it is to get an entire week alone with one of your children.  We had the opportunity to share conversations on our struggles, fears, happiness, politics, food, friends, family, life and how to experience joy, and of course love.  These conversations were shared in the backdrop of an incredible historic city.  I started this blog with the intention of understanding how sharing a meal, serving family and friends is central to my happiness and expressing love.  How wonderful that my son is carrying on that tradition and love.

We are living in difficult times and we were very fortunate to travel when we did to Istanbul.  The history, the sights, the food, the bazaar, the Bosphorous and the people were unforgettable.  I will never be able to describe the pure wonder of what we saw and I hope that tourists will not be afraid to venture out to this beautiful cosmopolitan city.

I am going to share a few pictures of the sights and also share with you the food we loved!  We picked this area of the world primarily because of the food.  I grew up on Armenian recipes, and yes I am an Armenian traveling to Turkey but this is part of our history.

The food that mirrors what I grew up with was closest to the Anatolian cuisine, as it is close to where my ancestors were from.  I can’t explain how excited I was to taste the flavors so much like my grandmother’s.

The sumptuous pomegranates are the fruit of choice… the seeds are in the salads, the juice is served at most meals and the salad dressings are mixed with this juice.  We fell in love with this fruit.  The next spice used in most of the meals was sumac.  We became fans of this spice on meat, in eggs, and on salads.  It was used in many ways making everything it touched was delicious!

I grew up eating lamb.  Since my father loved lamb, the Armenian heritage we learned to love lamb and this city is all about lamb.  We had lamb kouftas, lamb kebabs, lamb chops, lamb on lahmajoon (Armenian meat pie)… it was all lamb lamb lamb!  Meat is always served with fresh tomatoes, cucumbers, onions and a flat bread to wrap up your meat and veggies in.  Yalanchi and Dolma grape leaves wrapped around a meat or rice filling served hot and cold was another of my favorites and familiar to my Armenian recipes.  The salads made with rocket lettuce, parsley, sumac and pomegranate seeds with a dressing I am trying to duplicate.  And I have not even touched on dessert!

The Turkish delight with flavor combinations of walnuts, honey, pomegranate and pecans dusted with sugar and cut from logs appearing in bakeries up and down the busy streets.  I am now salivating thinking of the buttery, flaky Baklava.  It is layered and cut out of large sheets pans, it is rolled to look like cigars and dusted with nuts, and it was unlike any I have had here except my grandmother’s.  We felt like we were in dessert heaven and we weren’t even missing chocolate!   Quince is another fruit that I hadn’t had here in the states very often.  It was served cooked with a whipped milky cheese froth on top drizzled with honey and pistachios, another wonderful dessert.

Oh I think I forgot to mention the bread.  I have a recipe for choereg an Armenian buttery bread we had at breakfast and it was served for breakfast at a quaint cafe, the first time I have ever tasted anything close to my grandmother’s. They also served their version of Boereg, a similar bread to Choereg but layered with cheese and herbs.   We had rice and bulgur pilaf, a staple in my home.  I was in a carb/bread coma!

I could go on and on about the cheeses, the spices and the coffee.  I do have to share how special the tea was.  A perfect afternoon was sipping Turkish tea at the Topkapi Palace overlooking the Bosphorous and munching on baklava after a lunch of lamb kofta.  I love the tea served in glass vessels small and perfect… a special way to end an afternoon.

My heart is full and the memories are filling me up in such a special way.  This city is beautiful and the people are friendly.  I hope I will be able to go back someday.  Josh, this was a gift that I will cherish forever and the best part was spending the time with you.


Print Friendly, PDF & Email

recipe: window cookies

January 29th, 2016 | Posted by admin in Desserts | RECIPES - (0 Comments)

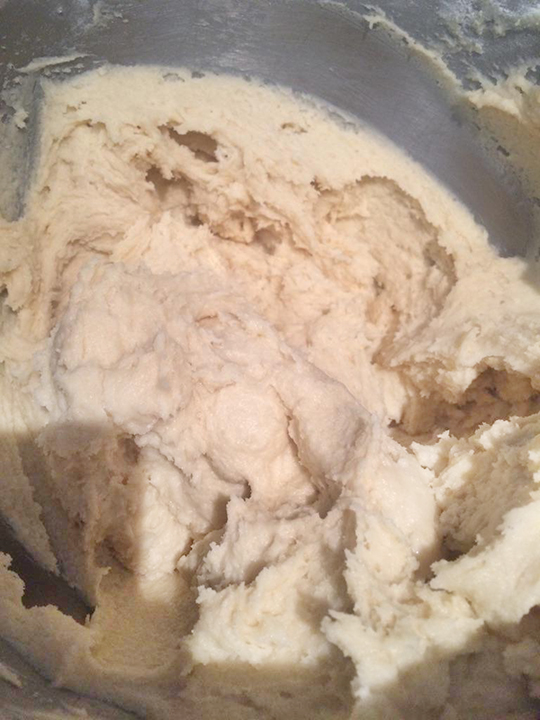
We call these “Window Cookies” and they are my younger son’s favorite cookie.  I make them at Christmas and Valentine’s day.  The center shape will change with the holiday but the cookie stays the same… so you can be creative.  This dough can be made with powdered sugar instead of regular and then altered some, but I think the crispness of the sugar cookie recipe makes this cookie taste the best and holds the jam better.  Have fun with this recipe as you can use all different flavors and colors of jam and you can cut out all different shapes.


INGREDIENTS:
• 2 sticks salted butter
• 1 cup sugar
• 1 egg
• 2 teaspoons vanilla
• 1 tablespoon buttermilk or cream
• 3 cups of flour
• ¾ tsp of baking powder
• dash of salt
• One jar seedless jam, raspberry, strawberry, pear, peach, or whatever flavor you prefer.
• 1½ cups powdered sugar, placed in a powdered sugar container.


DIRECTIONS:
• Beat butter, sugar, egg, vanilla, and buttermilk together until smooth.

• Slowly add flour, baking powder, and salt to the wet mixture.

• Make two slabs of dough, slightly flatten and wrap with parchment then with saran wrap.

• Put in fridge for 2 hours or overnight.

• Roll out dough and use with either circle or square cookie cutters.

• For each cookie you will have a bottom that is not cut out and a top that you cut a shape out of.

• Place cookies on cookie sheet in a 350 degree preheated oven, until they are slightly browned on the edges. (10min approx).

• Let cookies cool.

• Once cool, powder the bottom side of the bottom cookie and spread jam on the top.

• Powder the top of the cookie (the one with the cut out) and place on top of the jam.

• Repeat until you are done with the dough.  I keep the second slab of dough in the fridge until I am done with the first slab.

This recipe makes about 2 dozen cookies.  They are delicious as well as a great looking cookie.  Who doesn’t like jam on a crisp butter cookie?  Enjoy!


Print Friendly, PDF & Email

recipe: crack slaw

January 27th, 2016 | Posted by admin in Entrées | RECIPES - (0 Comments)

This recipe was given to me by a friend, and it works well if you are on a no carb/sugar diet.  My family loved this so the second time I made it I increased the recipe so I had plenty of leftovers!  I have changed the recipe a bit.  If you want to play with the flavors and texture you can always add water chestnuts for crunch and crushed peanuts or cashews.  I change a recipe most every time I make it depending on what I have in my pantry.


INGREDIENTS:
• 1½ lbs of ground beef (you can substitute turkey or chicken)
• 2 Tbsp of sesame oil
• 4 minced garlic cloves
• 6 diced green onions
• 16 oz coleslaw mix or shredded cabbage
• Salt & pepper to taste
• Boston Lettuce or smaller cups of lettuce

SAUCE INGREDIENTS:
• ½ tsp sweetener (Truvia)
• 1 tsp fresh grated ginger
• 1½ tsp white vinegar
• 3 Tbsp Tamari Sauce, a gluten free soy sauce
• ½ to 1 tsp of hot sauce (chili paste or Sriracha)


DIRECTIONS:
• Brown the ground beef in a large skillet, drain any fat, and set aside.

• Salt & pepper to taste.

• While the meat is browning, combine all the sauce ingredients.

• Heat up the sesame oil and add the garlic green onions and cabbage until cooked.

• Add the sauce and the ground beef mix well and serve hot with your lettuce cups.

This recipe is so easy and takes only a few minutes to put together so we have been making it quite a bit lately.

Enjoy!


Print Friendly, PDF & Email

wedding arrangement ideas

September 15th, 2015 | Posted by admin in FLOWERS | Indoor - (0 Comments)

I love to work with flowers!  Anticipating my son’s wedding next fall I went to the flower mart to pick up flowers I think will work for beautiful arrangements.  Just the first of many ideas. I picked up Bittersweet, a Premium Rose, Alchemilla, Allium, Spider Mums, Joe Pye Weed, Artichokes, Butterfly Weed Asclepia, Trachelium, Ranunculus, Scabiosa, Mums, Buxifolia, and Wild Grasses.  I used a large round clear vase filled with stones from my many trips to the beach at Lake Michigan and a smaller rectangular vase also filled with Lake Michigan stones. These arrangements are the first of several I will try for next year’s special day.


Print Friendly, PDF & Email